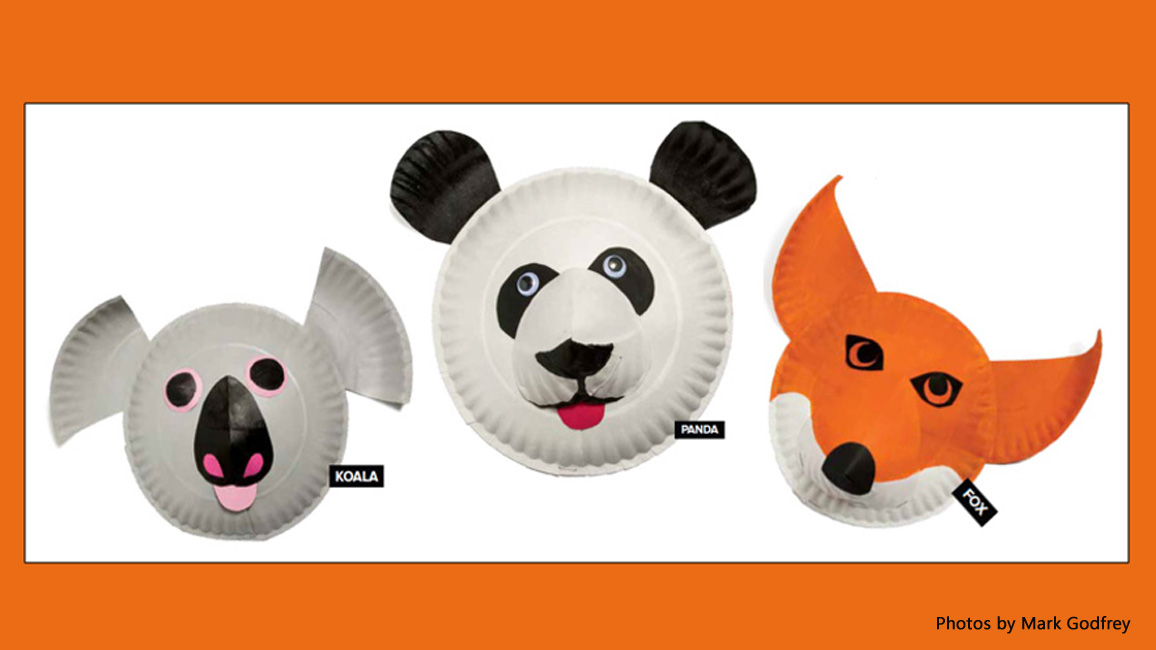
Decorate your room and other spaces with one—or more—of these wild animal faces!
by Donna Miller; photos by Mark Godfrey
What You Need
- 9″ uncoated paper plates
- poster or acrylic paint
- construction or other colored paper
- craft glue
- scissors
- large paper clips
- stapler
- buttons or googly eyes (optional)
- ear, nose, and tail patterns
What You Do (for one mask)
- To create a 3D face, make a dot in the center of a plate (bottom side) with a pencil. Draw a line from the dot to the rim of the plate. Cut along this line with scissors. Slide one side of the rim over the other, overlapping by 1.5 inches. Staple together.
- Cut out the nose and ear (or tail) patterns from another paper plate.
- For the nose, cut and fold along the lines as indicated in the pattern, then glue or staple in place. (If using glue, hold together with paper clips until the glue dries.)
- Brush two coats of paint over the plate and patterns you’ve cut out. Once the paint dries, glue or staple the pattern pieces to the plate, as shown.
- Cut facial features (such as eyes, spots, nostrils, and tongue) from colored paper. Arrange them on the plate and glue in place. If you want, use googly eyes or buttons instead of paper eyes. You could also paint features on the plate.
Want to use one of these masks for Halloween? Ask and adult to help you cut holes for your eyes. Then attach a paper-towel tube or paint stirrer to the back of the mask at the bottom for a handle.
