Use a plastic bag and water to demonstrate how webbed feet work.
What You Need
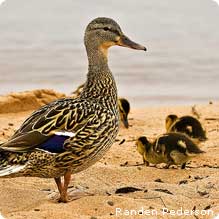
- Picture of a duck’s webbed foot
- Plastic sandwich bag
- Rubber band
- Toys that float
- Small portable tub
- Water
What You Do
- Look at a Webbed Foot
Show your child a picture of a duck’s webbed foot. Explain that the flaps of skin between the duck’s toes form what we call a webbed foot. - Experiment with the Plastic Bag
- Place a plastic bag over one of your child’s hands. Secure the bag in place with a loosely fitting rubber band.
- Ask your child: How is the hand that is covered with a plastic bag like a webbed foot? (Water cannot pass between the fingers of this hand, just as water cannot pass between the toes of a webbed foot.)

- Experiment with the Toys
Put two toys in the water. Then ask your child to do the following:- Put both hands in the water behind the toys. Spread your fingers apart on both hands and move them slowly back and forth.
- Now try to move the toys by pushing the water with your hands.
- Talk About What You Learned
Ask your child:- Which hand pushed the toys farther—the “webbed” hand or the “non-webbed” hand? (Webbed hand)
- What type of foot do you think would push a duck better through water—a webbed foot or a non-webbed foot? (Webbed foot)
- For an older child: How do webbed feet help ducks swim better? (No water can pass through gaps between the toes. This gives the feet more force per stroke against the water.)